Lab 12.1. Create a Basic squid Forward Proxy
**NOTE: **
change X and Y according to your pod number (find details in docs support)
Execute on node1
1. Ensure squidis installed
sudo -i
apt  install -y squid
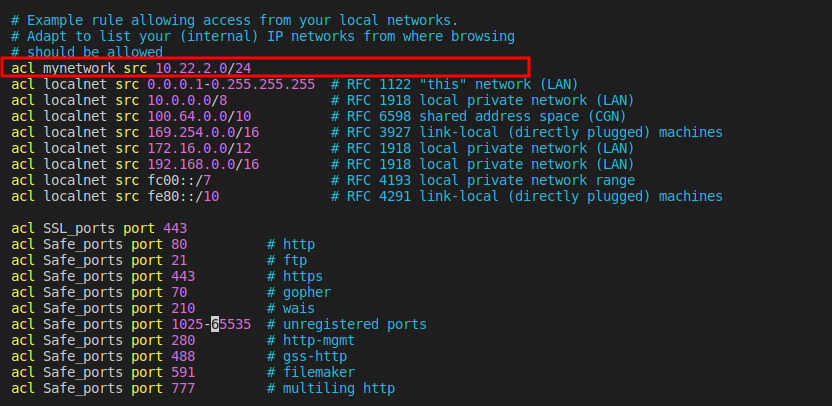
2. Create an ACL for your network. Edit /etc/squid/squid.conf:
vim /etc/squid/squid.conf
add an ACL above the existing ACL’s.
acl mynetwork src 10.22.X.0/24
Example content:
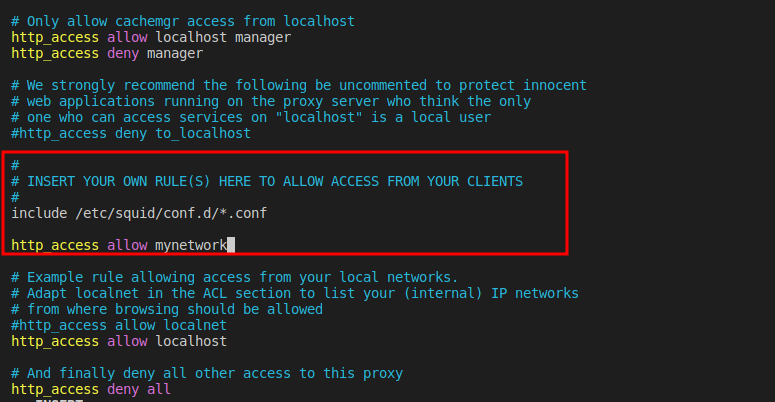
3. Locate the following line in the squid.conf file:
# INSERT YOUR OWN RULE(S) HERE TO ALLOW ACCESS FROM YOUR CLIENTS
4. Explicitly allow HTTP access for the newly created ACL, by adding this line below the line above:
http_access allow mynetwork
Example content:
5. Test the syntax of squid.conf:
squid -k parse
6. Start or restart the Squid daemon:
systemctl restart squid
systemctl status squid
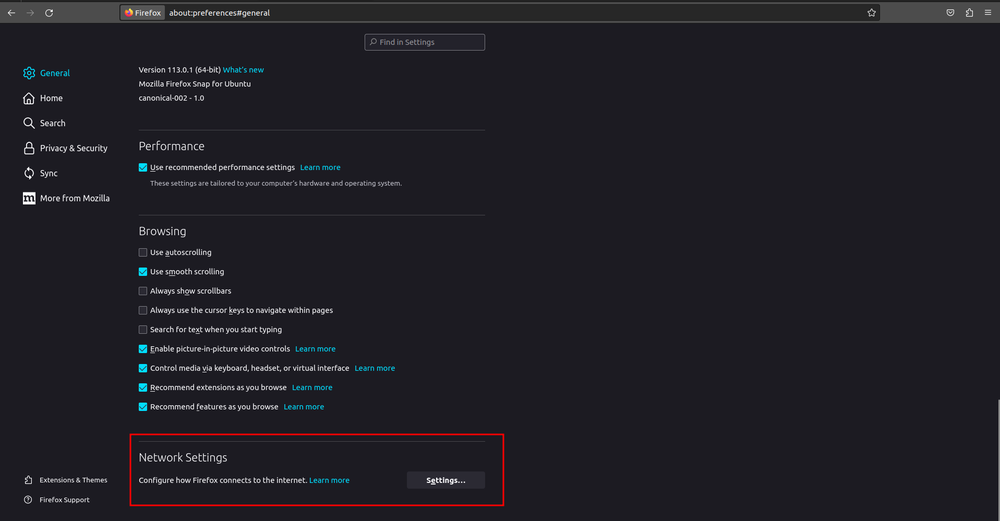
7. Configure a web browser to use your new proxy. For example we are using Firefox.
Settings - General - Network Settings
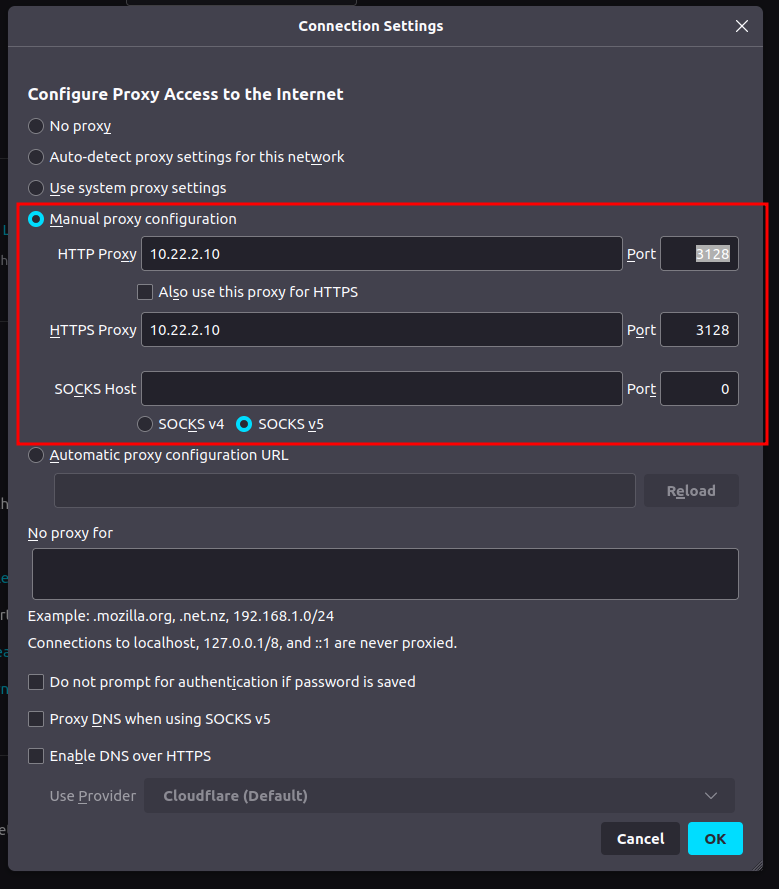
Fill in proxy data:
-
HTTP Proxy : 10.22.X.10 - Port: 3128
-
HTTPS Proxy : 10.22.X.10 - Port: 3128
Example:
8. Test the proxy:
Visit a known good URI (https://www.foxnews.com/).

Visit a known non-existent URI (http://sdfa.klj.example.com).
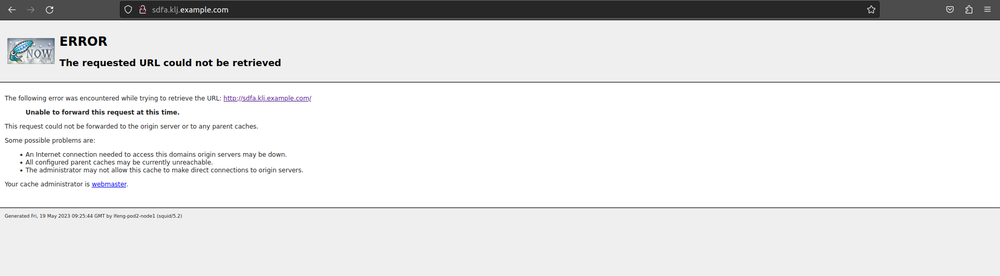
NOTE: You should see a Squid error page when you attempt to access the non-existent URI.